
Miss thistles house has a roof and a door! It opens and closes and everything. The secret ingredients? Cardboard and colored pencils.

To make the door I started by tracing the door opening onto corrugated cardboard and cutting it out. It pretty much fits. It fits enough… The edges were covered in masking tape and then I traced the door onto chipboard – thin cardboard – twice.
This post contains an affiliate link – meaning I get a small commission if you purchase through the link – marked with an *asterisk.
Using a scrap of cardboard as a spreader I applied a thin layer of *my favorite craft glue all over and sandwiched the corrugated door shape between the two chipboard layers. A stack of books on top (with wax paper between in case of glue seepage) kept everything compressed until it dried completely.
The base coat of paint is army green. Next it was dry brushed with a darker emerald green. The board lines were drawn on with a fine tip marker.

What really makes the paint job sing is the next step – bright green colored pencil. It creates a soft, chalky, finish like weathered milk paint. I highlighted the boards here and there. If you’re imagining a red door, try something like -medium red for the base, burgundy for the dry brush and an orangey red colored pencil for the highlight. You get the idea.
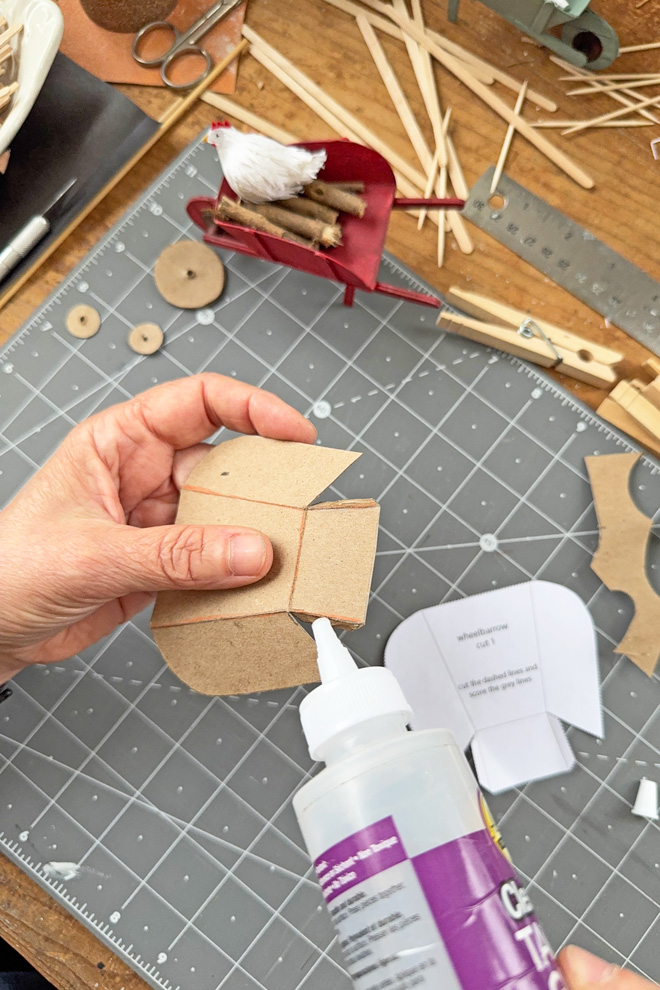
The tiny hinges are also cardboard, 2 little pieces of chipboard ½” X ¾ inch. Folded in half (the longer side).
Open and add glue on the inside at the crease.
Fold back together- pinching the crease and open the sides like wings.
A sharpie worked perfectly for coloring without making the the cardboard soggy.

Brown colored pencils add a rusty highlight. It’s surprisingly convincing.
I glued one side to the door and waited like an adult for that to thoroughly dry and then glued the other side to the house. A couple little twigs made sweet, rustic door knobs.
I had tried a bunch of more complicated solutions that didn’t feel quite right for the house. I love it when the answer is cardboard. You could get fancy with the shape and these would also be great for tiny cabinets.


and we gotta talk about the fully shingled roof!
I had begun adding cardboard shingles with wood glue but switched to hot glue for efficiency. The shingles are made from thin corrugated cardboard (it was a shoebox). The size varies and the shapes are a little irregular – they are mostly around 1 X 1.5 inches.
The shingles got a light coat of reddish brown. The secret to painting cardboard is being quick, light and dry about it. Work in layers.
A lighter gold color highlights individual shingles here and there. And finally a dry brush of raw umber for texture. I do use water to thin the raw umber but the touch is super light.

The chimney is just about finished too – I want to add some details to the stones- the full tutorial for making egg carton masonry is here.

Shutters, maybe window boxes and definitely some folk arty details are next. Stay tuned.
Does your tiny doll have a house? Are there mini cardboard hinges in your future?
PS – Happy mother’s day! I’ll leave you with a sweet photo of my Mom on her wedding day (I’m pretty sure the little girl is another awesome mom, my Aunt Annie Biggles). Such a great picture.


 The two pages above, created by Stitch Club member Barbara, are bursting with movement and energy. There’s an incredible sense of vibrancy, drawing you in—there’s so much to explore, and it pulses and vibrates… Barbara has been a member from the beginning and it’s been super interesting to watch her tap into her intuition more and more. One of the core goals of this kind of improvisational work is to deepen that connection. I firmly believe that work, that practice, that listening delivers our best and most singular work.


